Age of Empires 2 Download for Mac Os X
About Historic period of Empires 4 on Mac
Age of Empires 4 is currently only playable on Mac via workaround methods such as the use of a virtual auto or Boot Camp Banana. There's no Age of Empires four version for Mac and the game is currently not bachelor on any cloud-gaming service.

Age of Empires 4 just came out, and fans of the RTS gaming genre all over the world are excited to encounter what new information technology brings to the tabular array. Thus far, the game has been receiving primarily favorable reviews from both critics and gamers, getting praised for its beautiful graphics and engaging gameplay that builds on the previous installments of the Historic period of Empires franchise.
Similarly to Historic period of Empires 2 (and its numerous expansions and editions), AoE iv, too, primarily focuses on medieval history, giving the player the selection to control one out of viii historical civilizations (the English language, the French, e Mongols, the Abbassid Dynasty, the Chinese, the Delhi Sultanate, the Rus, and the Holy Roman Empire) in a battle for resources and military domination.

Unmarried Players Campaigns
Similar its predecessors, AoE 4 is both a multiplayer and a unmarried-histrion game. Its single-player currently has four campaigns, each focusing on a specific civilisation and a major office of European history. The four single-thespian campaigns are:
- The Normans, which tells the story of the Norman conquest of the British Isles.
- The Hundred Years war – the groovy conflict between France and England.
- The Mongol Empire – the rapid Due west expansion of one of the largest empires in medieval history.
- The Rise of Moscow, which focuses on the ascent of the Grand Duchy of Moscow.
Of course, one can also choose to play in Skirmish fashion versus an AI opponent of appropriate difficulty as a part of the single-player experience.
Obviously, there's besides the multiplayer attribute of AoE 4 and there'due south already quite a large number of players fighting for domination over their opponents in a diversity of game modes.

No macOS version
Unfortunately for Mac owners who want to play the latest installment in the Age of Empires franchise, there isn't a macOS version, and it is unlikely that there will be ane in the foreseeable future. And so, with this in listen, are there any alternative options to run the game on a Mac? Well, a popular method of playing PC games on Mac machines is through the utilize of cloud-gaming services such as GeForce At present and Google Stadia. However, for the time being, AoE 4 isn't bachelor in whatever such cloud-gaming service, so this, besides, is not an option. Luckily, for Mac users that want to try the game, there may yet be a way (two in fact) to go it going on your computer. The methods we volition evidence you involve the installation of Windows 10 or Windows 11 on your Mac, through the use of virtualization software or with the assist of the trusty Boot Army camp Banana app. You can find detailed instructions for both of those methods downwards beneath, simply before you try either of them, you must first make sure that your Mac meets the requirements for Age of Empires 4.
Editors' Pick: Play Genshin Touch on on Mac
MINIMUM:
- Requires a 64-bit processor and operating system
- OS: Windows 10 64bit or Windows xi 64bit
- Processor: Intel Core i5-6300U or AMD Ryzen 5 2400G (or equivalent)| CPU with AVX support required
- Memory: 8 GB RAM
- Graphics: Intel HD 520 or AMD Radeon RX Vega 11 (or equivalent)
- DirectX: Version 12
- Storage: 50 GB bachelor space
RECOMMENDED:
If your Mac meets those specifications, you should exist able to run the game – all that is left to practise is gear up everything up so that you lot can install it and start playing.
- Requires a 64-bit processor and operating system
- Bone: Windows 10 64bit or Windows 11 64bit
- Processor: 3.six GHz 6-cadre (Intel i5) or AMD Ryzen five 1600 (or equivalent)| CPU with AVX support required
- Memory: 16 GB RAM
- Graphics: Nvidia GeForce 970 GPU or AMD Radeon RX 570 GPU with 4 GB of VRAM (or equivalent)
- DirectX: Version 12
- Storage: 50 GB free space
Play Age of Empires iv on Mac M1
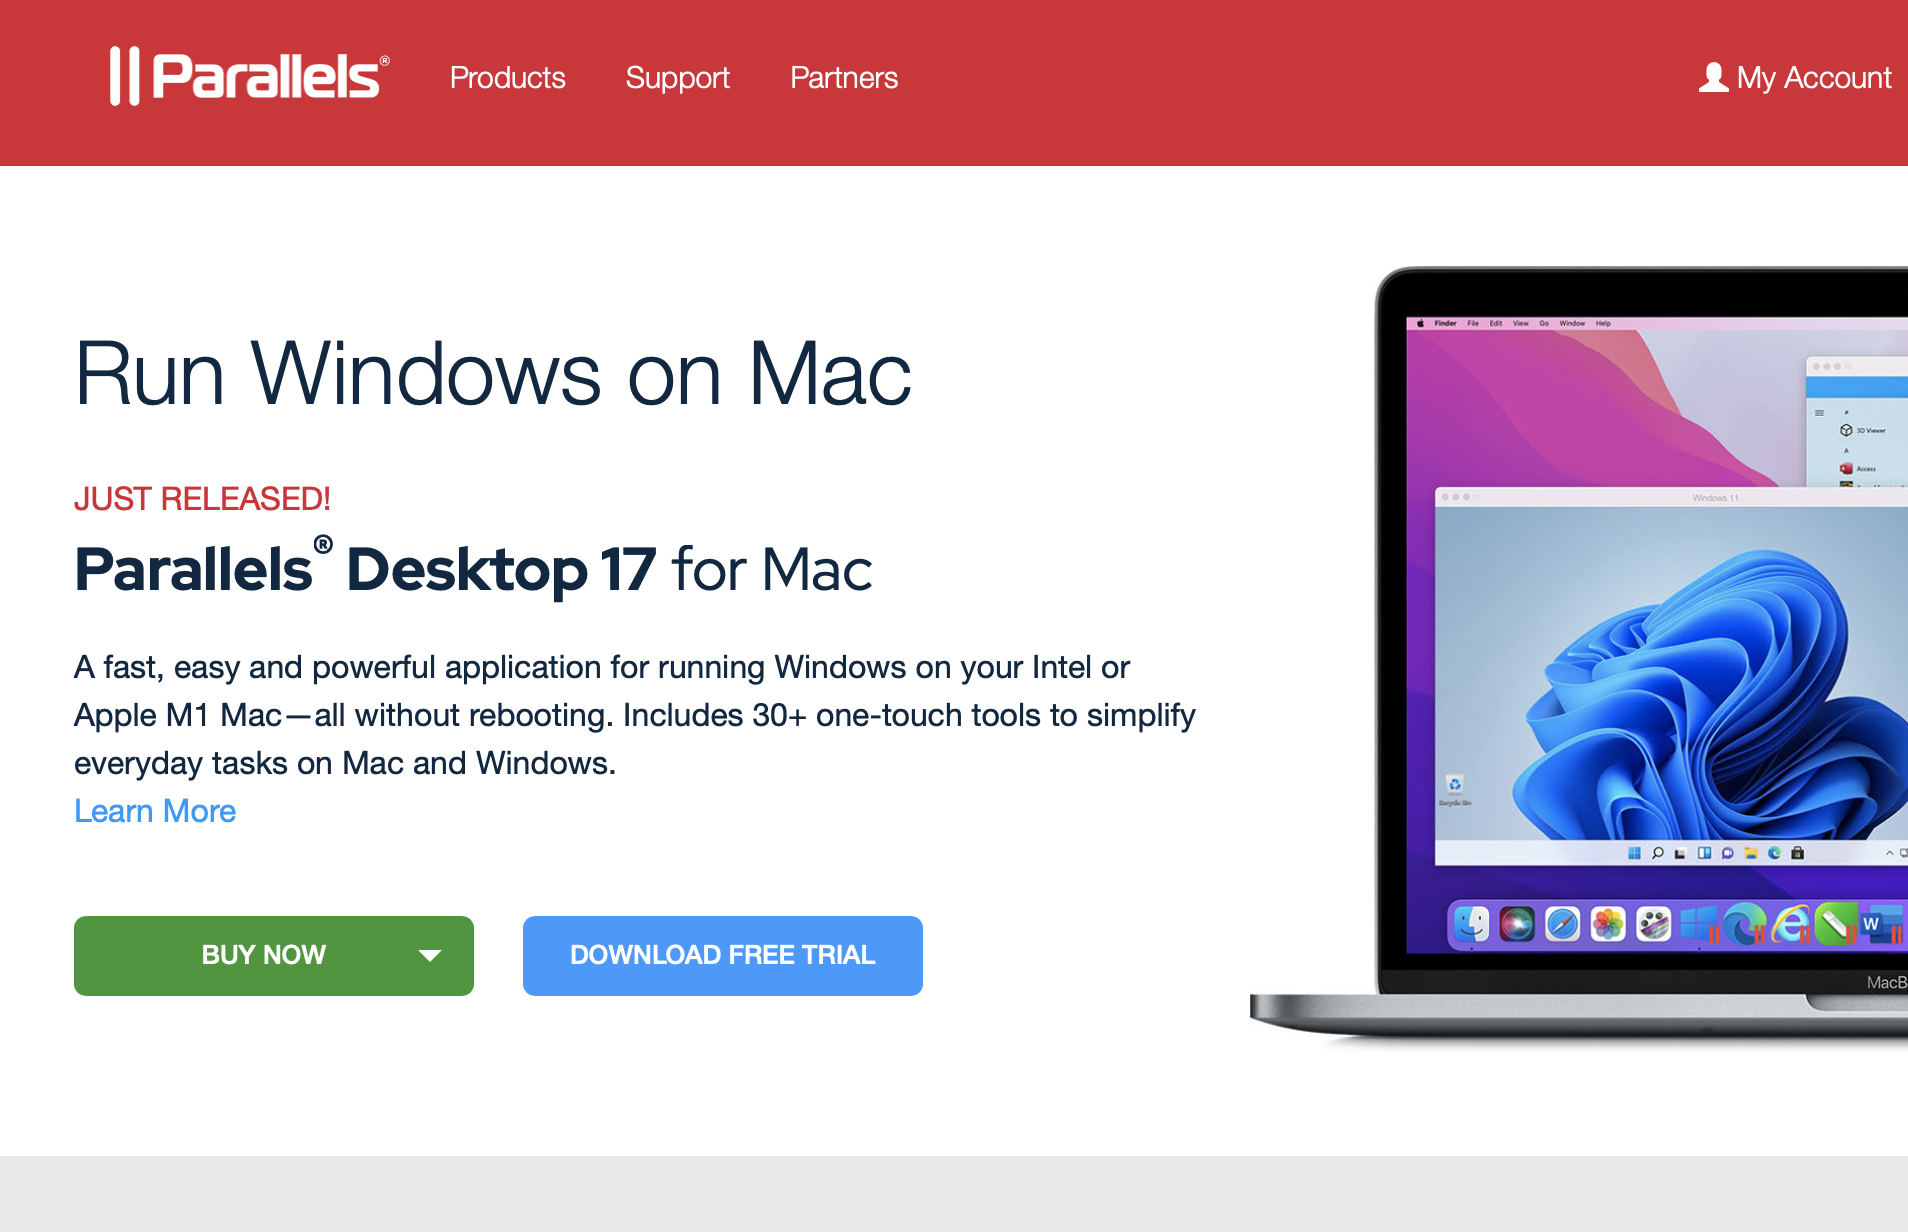
Age of Empires four tin can be played on Mac M1 through the use of a virtualization programme such as Parallels. Using Parallels, y'all can create a Windows 11 virtual machine and, within it, play Historic period of Empires 4 on your Mac M1.
Since at that place isn't a macOS version for Age of Empires four and M1 Macs don't have the Kick Campsite Assistant app, the simply viable style of playing this game on an M1 Mac at the moment is through the utilize of virtualization software. Parallels is the programme nosotros will be using as an example since it has proven to allow Mac M1 users to run a diverseness of Windows games on their Macs. Annotation, however, that this isn't an official method of playing the game and at that place may exist issues involved in it, especially when talking about a game that merely got released. Also, bear in listen that this is a paid program, and then our advice is to employ the gratis 14-day trial to see if Parallels would enable you lot to run AoE 4 on your Mac with acceptable performance then that you tin can make up one's mind whether it'southward actually worth it for you to purchase the full version of the program. With those couple of notes out of the mode, hither is how you lot can create a Windows 11 virtual machine on your Mac and, with its help, run Age of Empires 4 on your M1 Mac.
- First, get to the Parallels site and click Download Free Trial.
- On the side by side page, select Download At present and download the Parallels installation file.
- Open the installation file for Parallels (Install Parallels Desktop.dmg) and so double-click on Install Parallels Desktop.
- Your Mac volition probably warn y'all that the program is from the Net and ask you if you are certain you want to install it/open it – ostend that this is what you want to do, since Parallels is a legitimate and perfectly safe program.
- Parallels volition commencement downloading data needed for the installation – wait for it to terminate, then enter your Admin password, and after another cursory waiting menstruation, give the Parallels the permissions information technology needs from you.
- If on the next screen of Parallels, you see Download and Install Windows 10, select the Skip button.
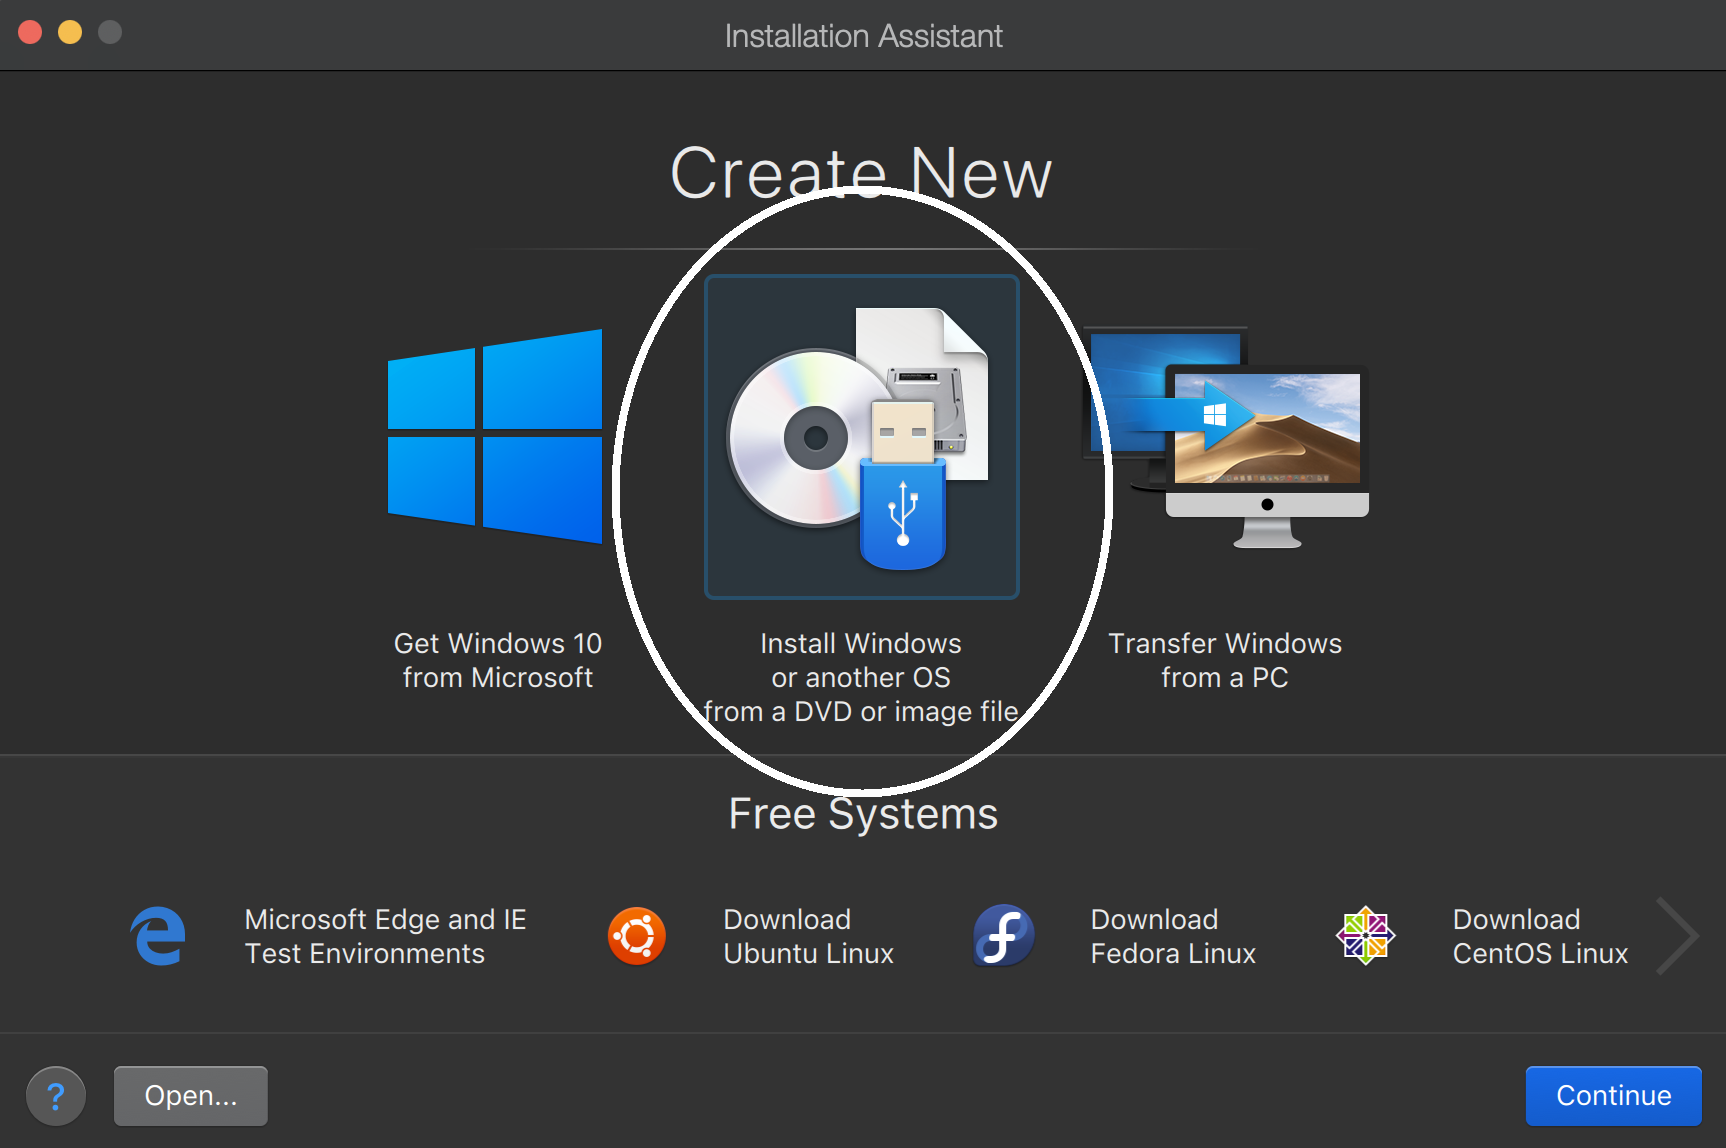
- Next, select the Install Windows or another OS from a DVD or image file push and then click Continue.
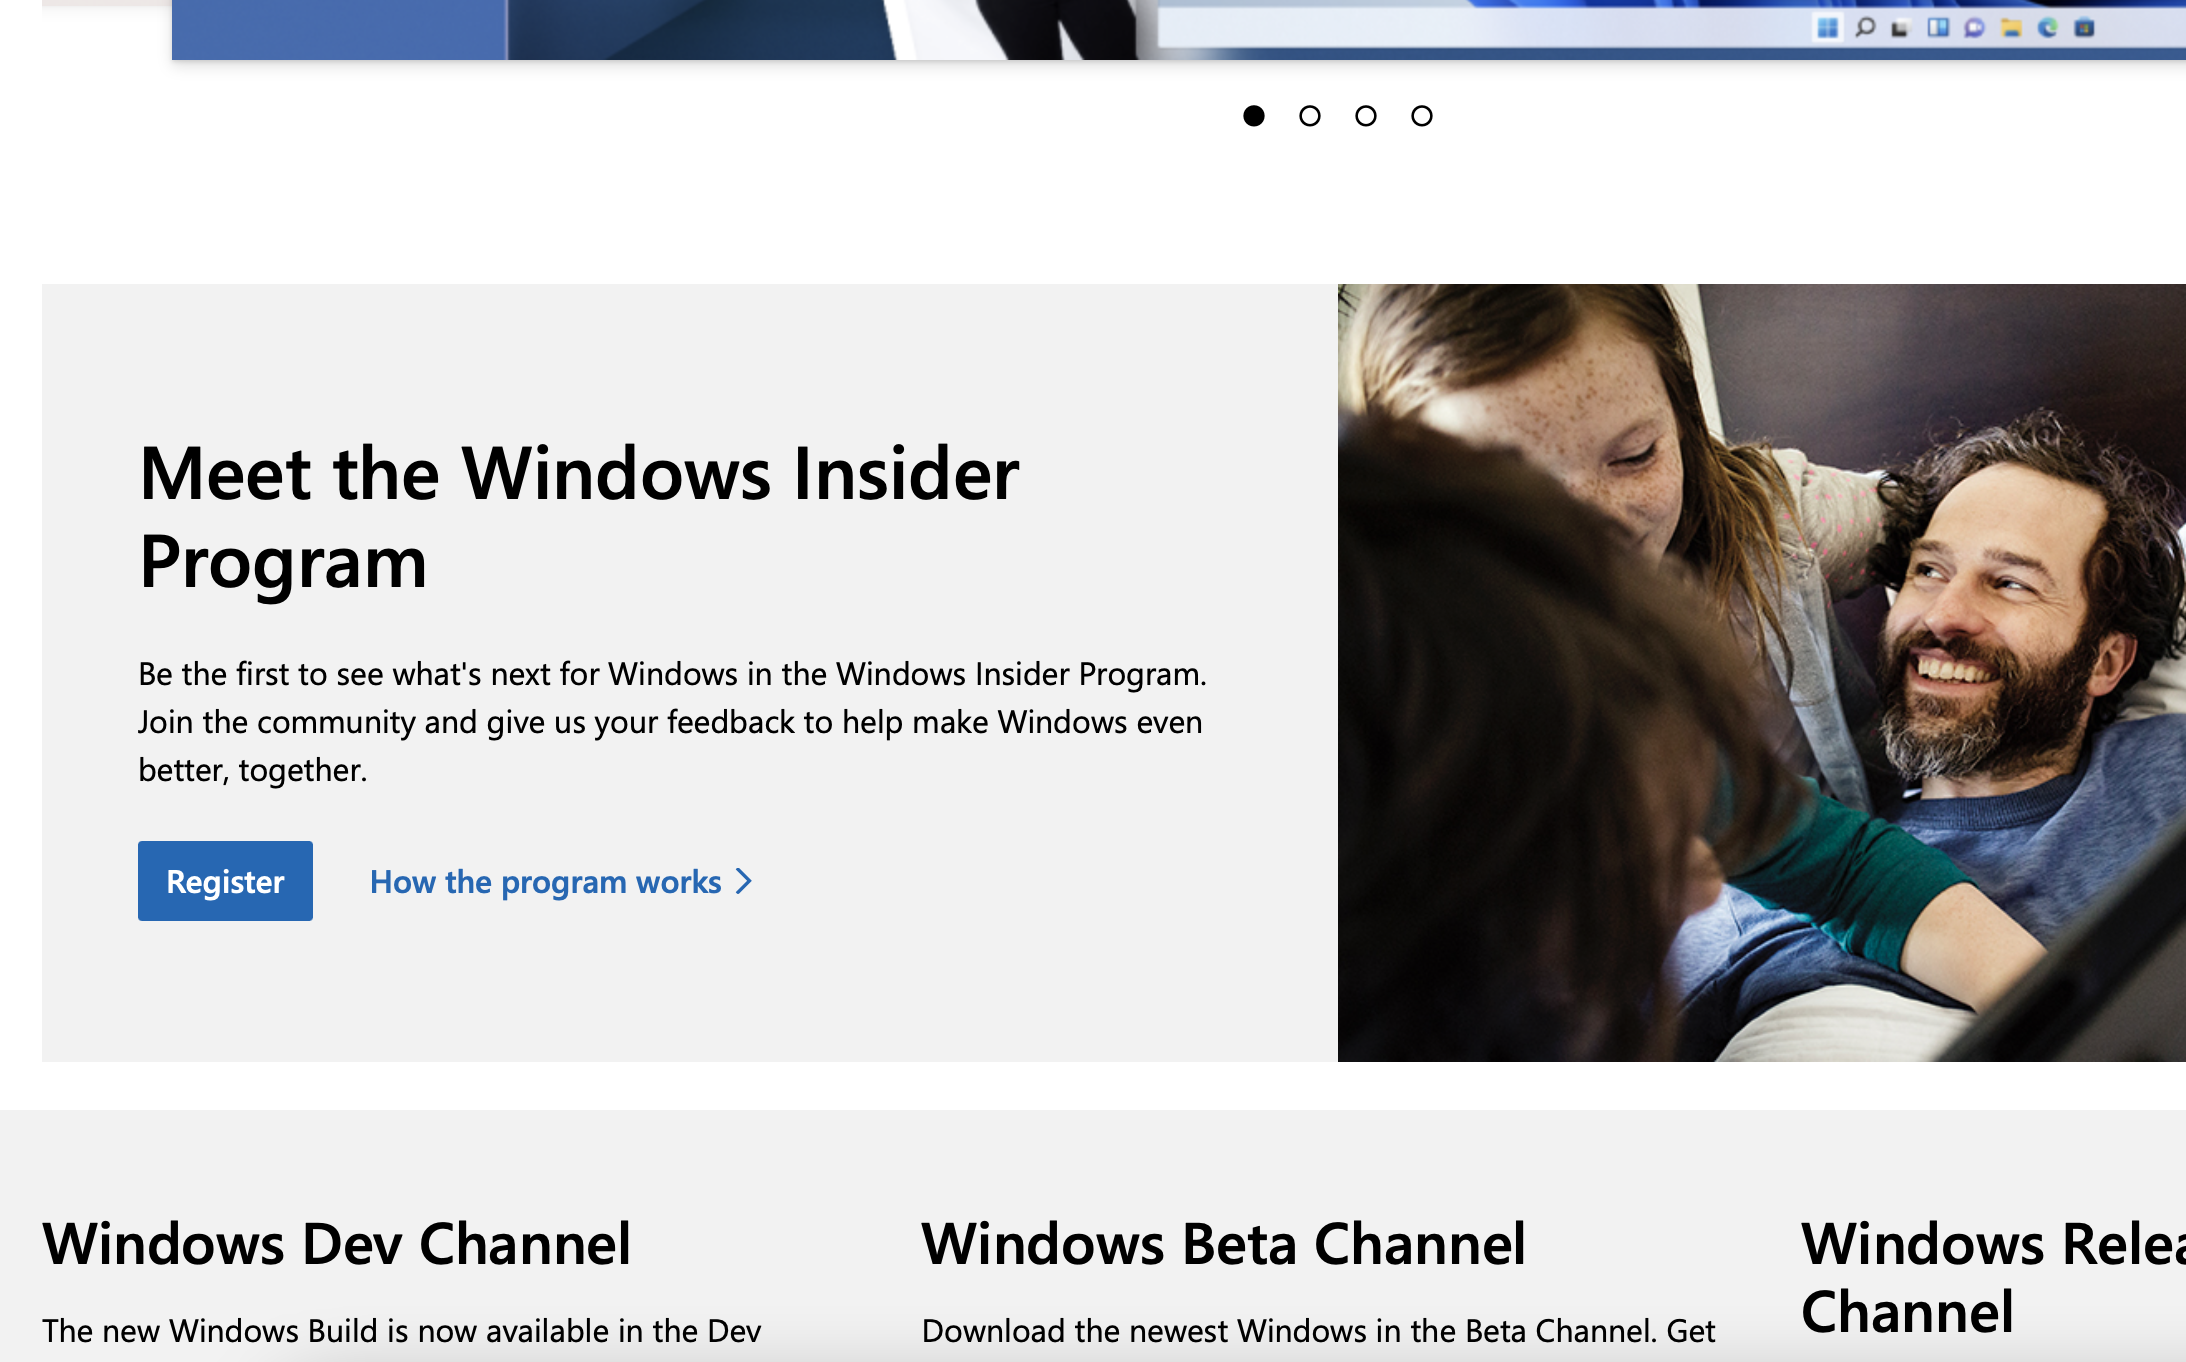
- Later on that, you need to enroll in the Windows Insider program – to practice this, go here and click Register nether Encounter the Windows Insider Programme.
- Side by side, if yous already have a Microsoft business relationship, sign in with information technology, and if not, create one and employ it to sign in.
- Click the Register button on the next folio then click Flight Now/Start Flighting.
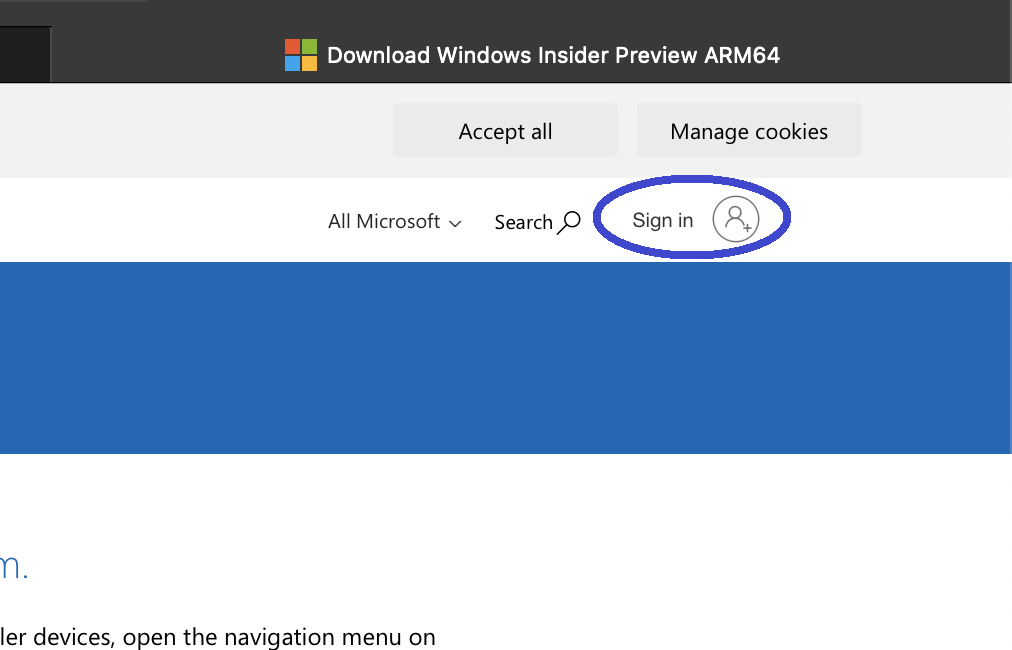
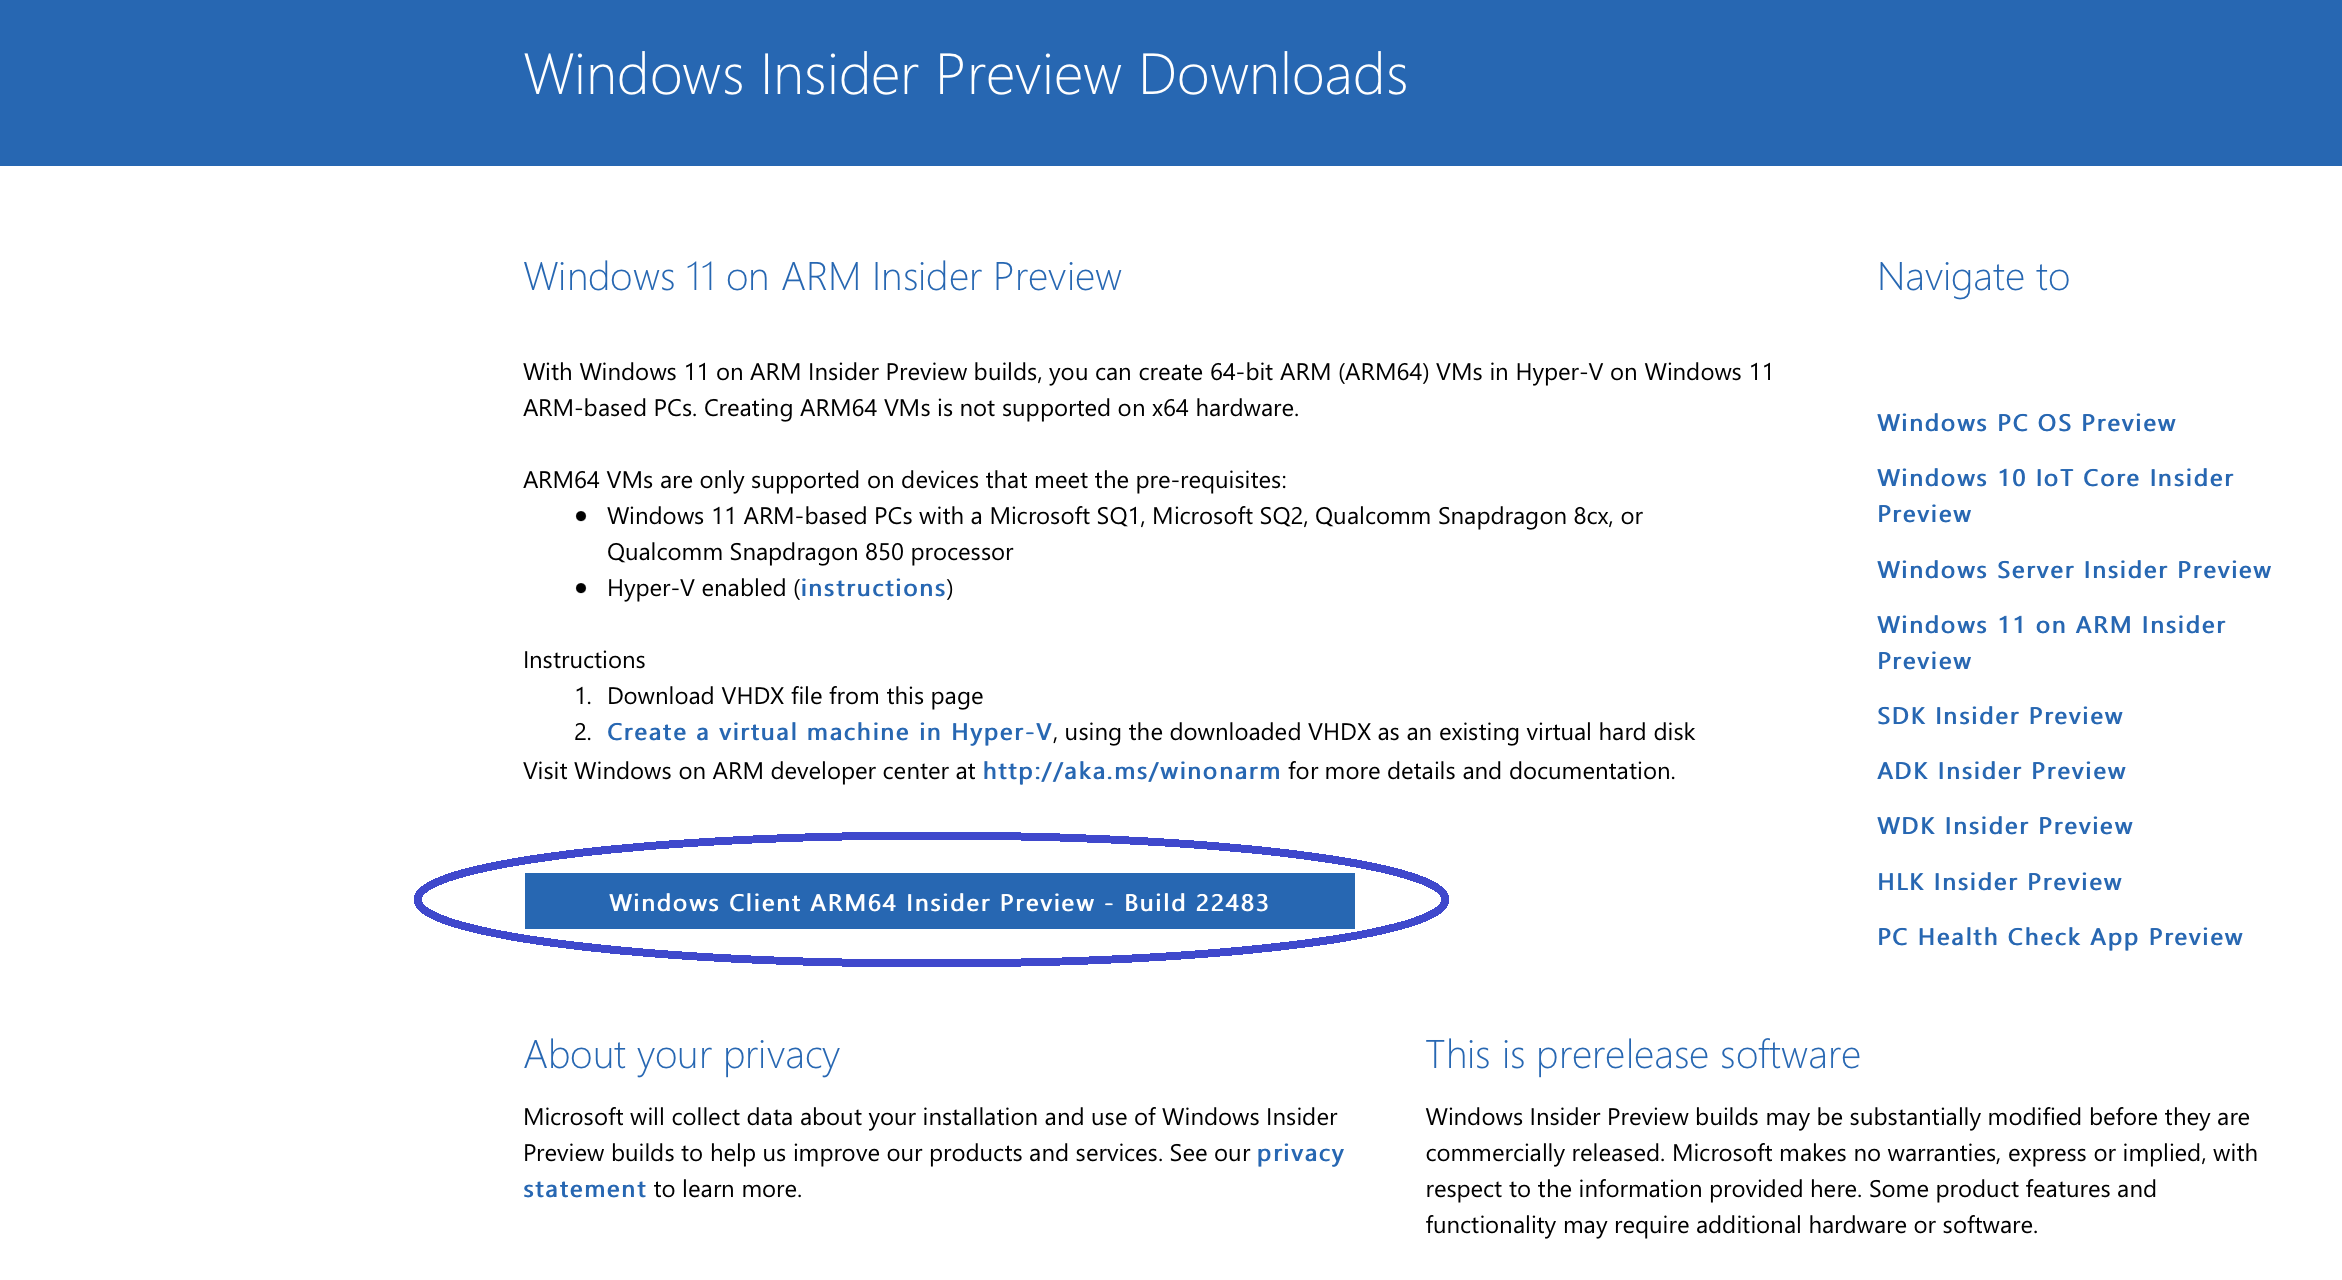
- Next, you must click on this link and if you aren't already logged in to your Microsoft account on the folio that opens, you must log in to information technology by clicking the profile icon in the pinnacle-left.
- Now you should come across a Windows Client ARM Insider Preview push button on your screen – click information technology to download the Windows 11 ARM VHDX file that will be used for the VM (virtual machine). This is a big file, so downloading information technology volition have some time.
- Once the Windows eleven ARM VHDX file downloads, click Find Automatically in Parallels and the plan should find the downloaded file. If information technology doesn't find it or if there are several VHDX files on your Mac, y'all must manually navigate to the Windows 11 ARM VHDX file and drag-and-drib it to the center of the Parallels window.

- Adjacent, select Continue to begin the installation of the VM.
- Since you want to use the virtual auto for gaming, we suggest selecting the Games Only option in the next screen of Parallels and then as to optimize the VM for gaming.
- We also suggest that you cheque the Customize option so that y'all get to change some of the VM settings before its installation begins in club to allocate more hardware resources to information technology and thus become better gaming performance.
- Next, click on Create and the installation will start. If you lot checked Customize in the previous step, you will first become an options window with different customization settings – there, we recommend allocating more (but not all) RAM (memory) and CPU cores to the virtual machine. Note that the minimum RAM required to run this game is 8 GB. If your Mac M1 only has 8 GB, you can either allocate 6 GB to the VM and promise that'south still going to exist plenty or allocate all 8 GB and hope that your Mac won't crash while the VM is running. Either way, it's not ideal, and then it's best to just proceed if your M1 Mac is a xvi GB model. Afterwards you are washed customizing the settings, close the customization window to begin the installation.
- During the installation, give any necessary permissions that may be required of you lot.
- In one case the installation is over, go to the Windows 11 VM, open the Showtime Bill of fare in the bottom-left, go to Windows Update, and allow Windows xi to install any bachelor updates that information technology may find.
- Side by side, click the Start Menu over again, select the Power button, and click on Restart.
- After the VM restarts, wait for Parallels Tools to (re)install (this should happen automatically) and after that you should exist ready to get.
Helpful tips:
- You can hands switch between the Windows eleven VM, any other open apps, or your macOS interface through the Command + Tab keyboard combination or past swiping left or right with three fingers on your trackpad.
- You can interruption Parallels at any time by switching to macOS, clicking the Parallels menu from the top of your screen, selecting Actions, and and so selecting Pause. To unpause Parallels, apply that aforementioned menu or past click the Pause push button in the middle of the screen when you switch to the Windows eleven VM.
- Yous can employ the Parallels card in macOS to quit the program or go to the VM, select the Start Menu, click the Power button, and select Shut Downwards.
How to play Historic period of Empires iv on Mac Boot Camp
To play Age of Empires 4 on Mac, you can use Boot Army camp Banana to install Windows 10 and then utilise the Windows ten partition to play the game. Alternatively, y'all can play Historic period of Empires 4 on Mac through a Windows 11 virtual machine.
Above, we explained how to employ Parallels to create a Windows xi virtual auto on a Mac – this can be done in both Intel-based Macs and Macs with M1 chips, so if y'all have a Mac with Intel CPU, you tin still effort the Parallels method. Nonetheless, on Intel-based Macs, you can likewise utilise the congenital-in Boot Military camp Assistant app to install Windows 10 in a dissever partition on your Mac and so download and play the game from inside that partition. Below, we have shown exactly how to do this – the process is totally complimentary, so if you don't desire to purchase Parallels and you are on an Intel Mac, you can give it a endeavour and run across how well it works for you. Once again, note that it wouldn't be unexpected if yous run across problems with AoE 4, since this method of playing it isn't official and would be perfectly normal if something doesn't work the way you intend it to.
- First, you demand to go to the Microsoft site and download the needed ISO file for Windows 10 – click this link to begin.
- In the Microsoft page that opens, first select a Windows 10 edition (we recommend selecting the plain Windows ten edition), click Confirm, then pick a language of your preference, and click Ostend once again.
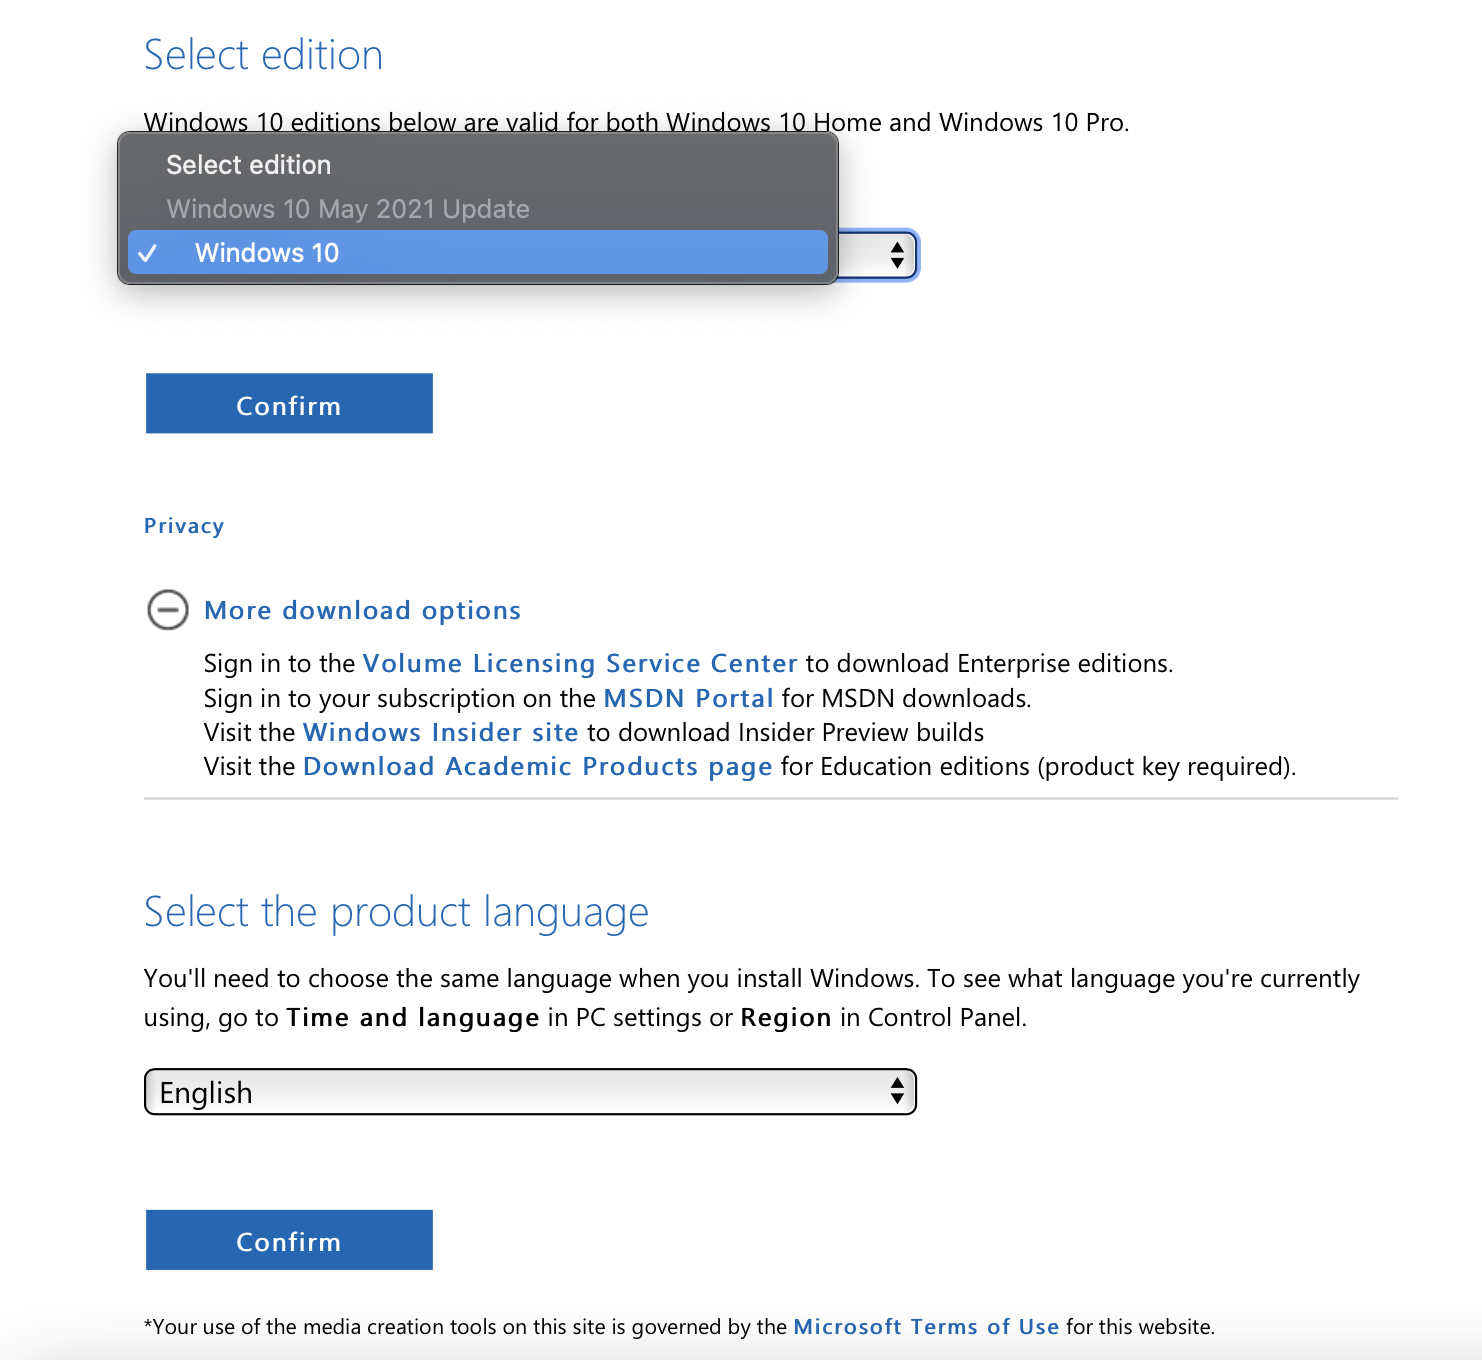
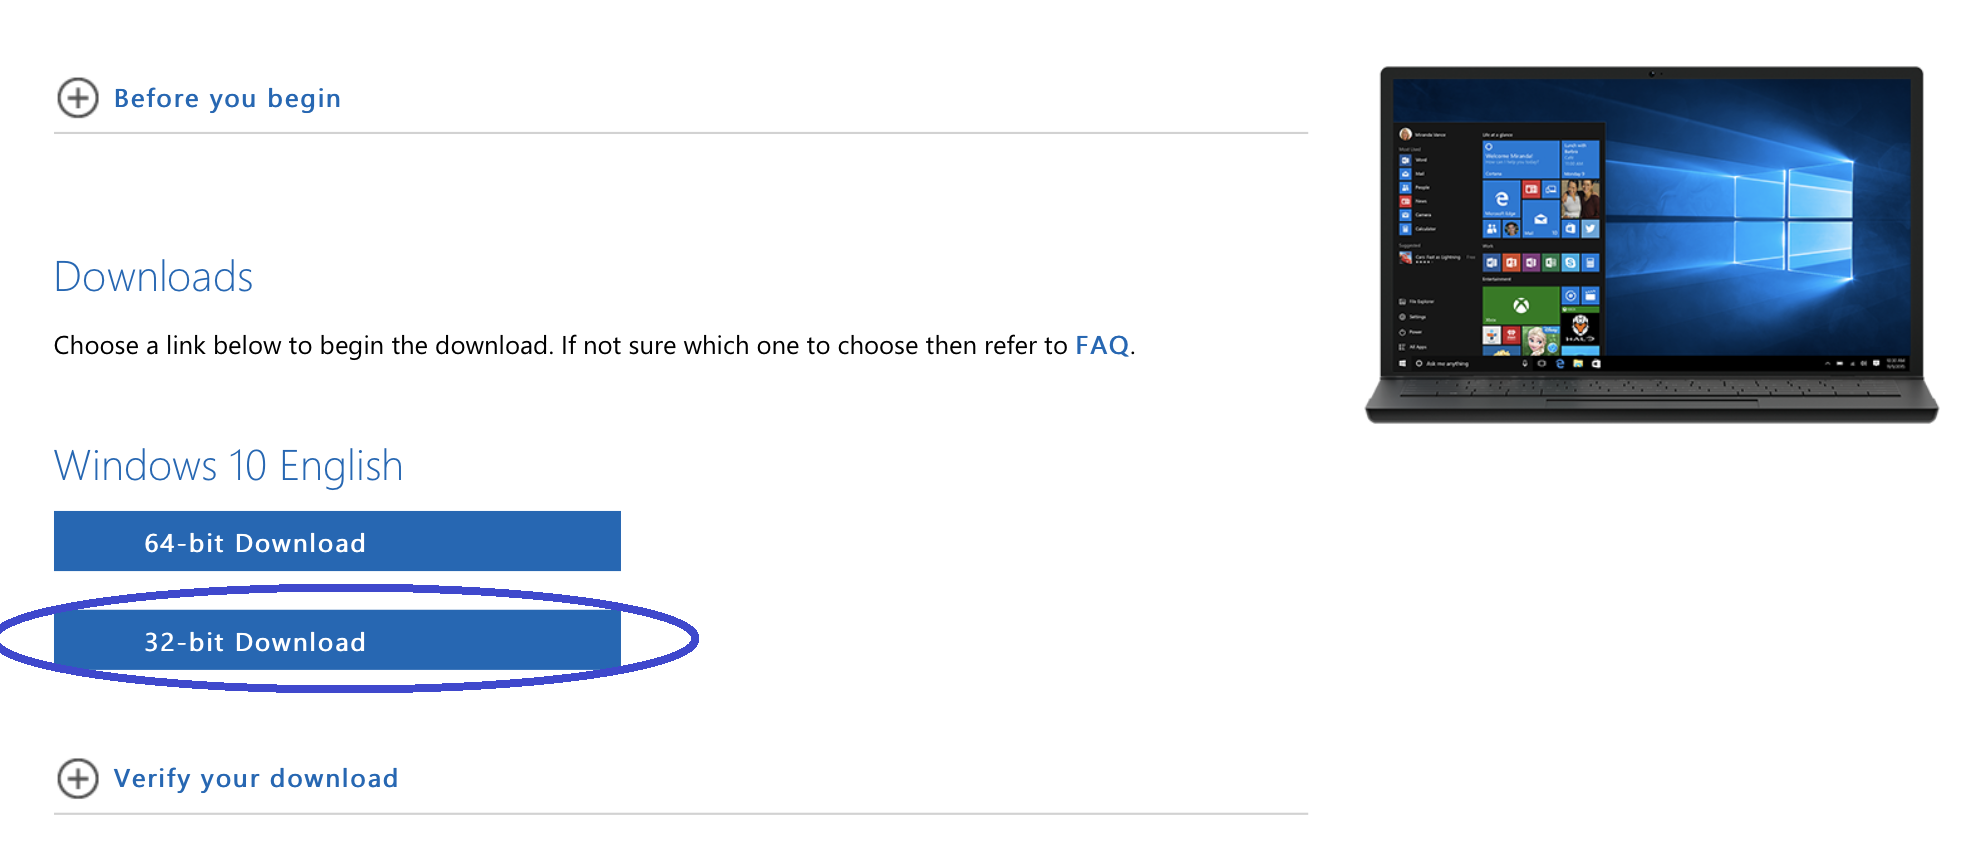
- Now click on the 64-bit Download to start downloading the Windows 10 ISO file. The file is big, and information technology volition take some time for it to download on your Mac.
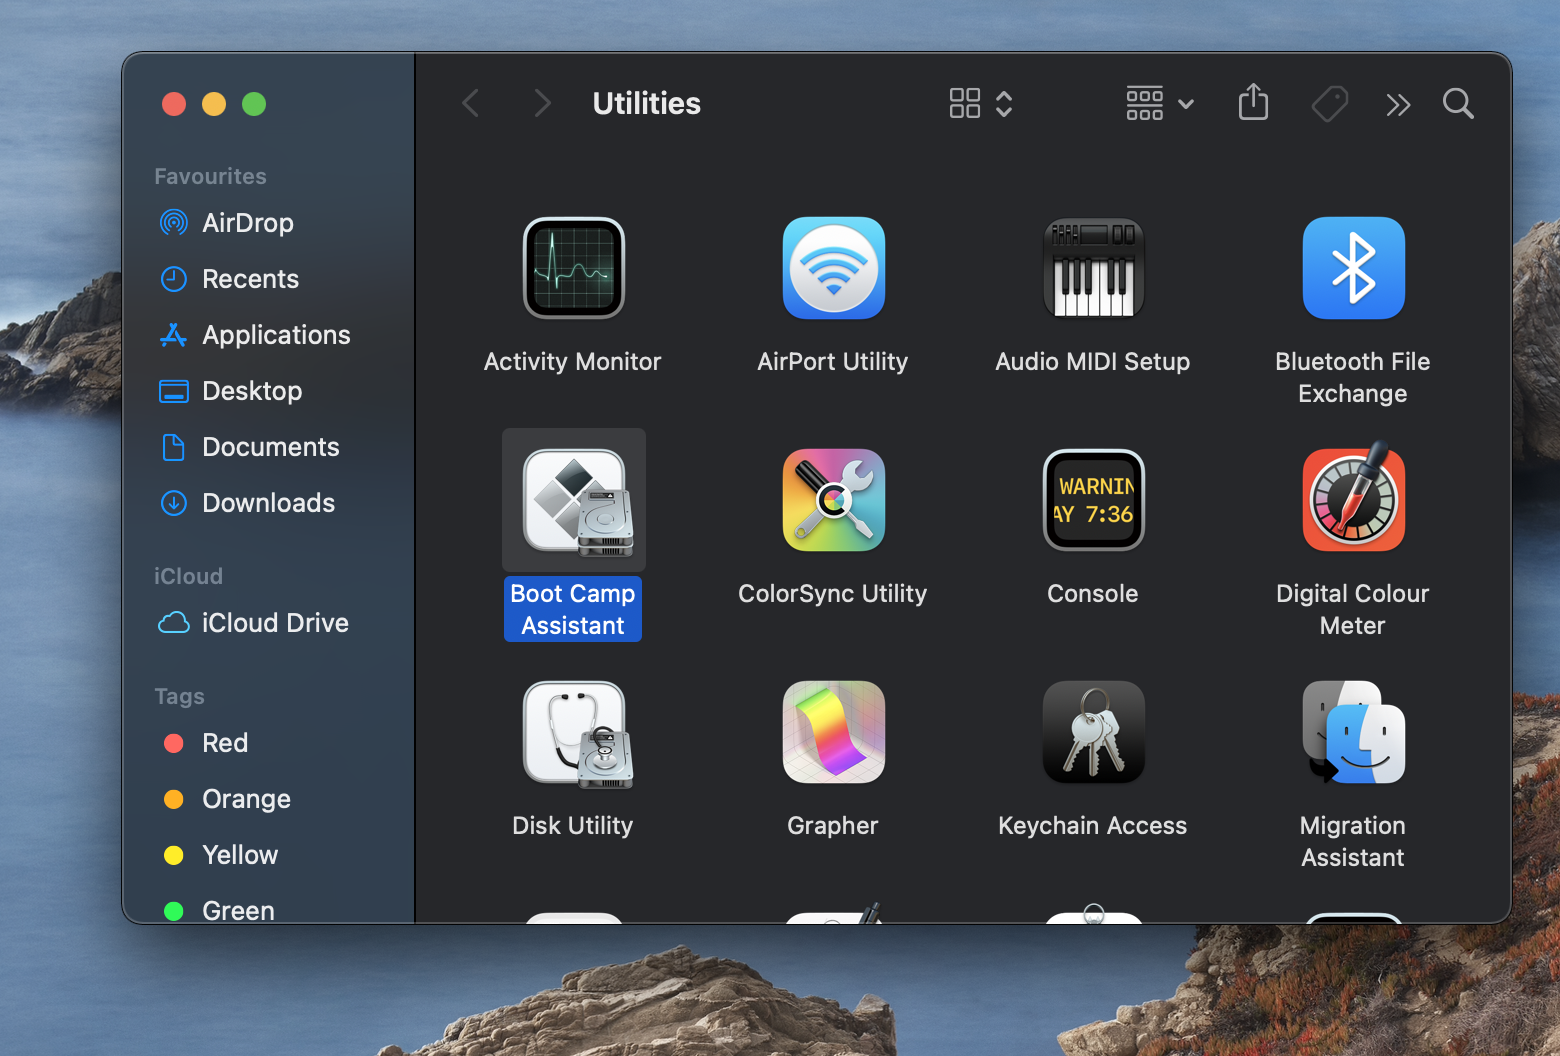
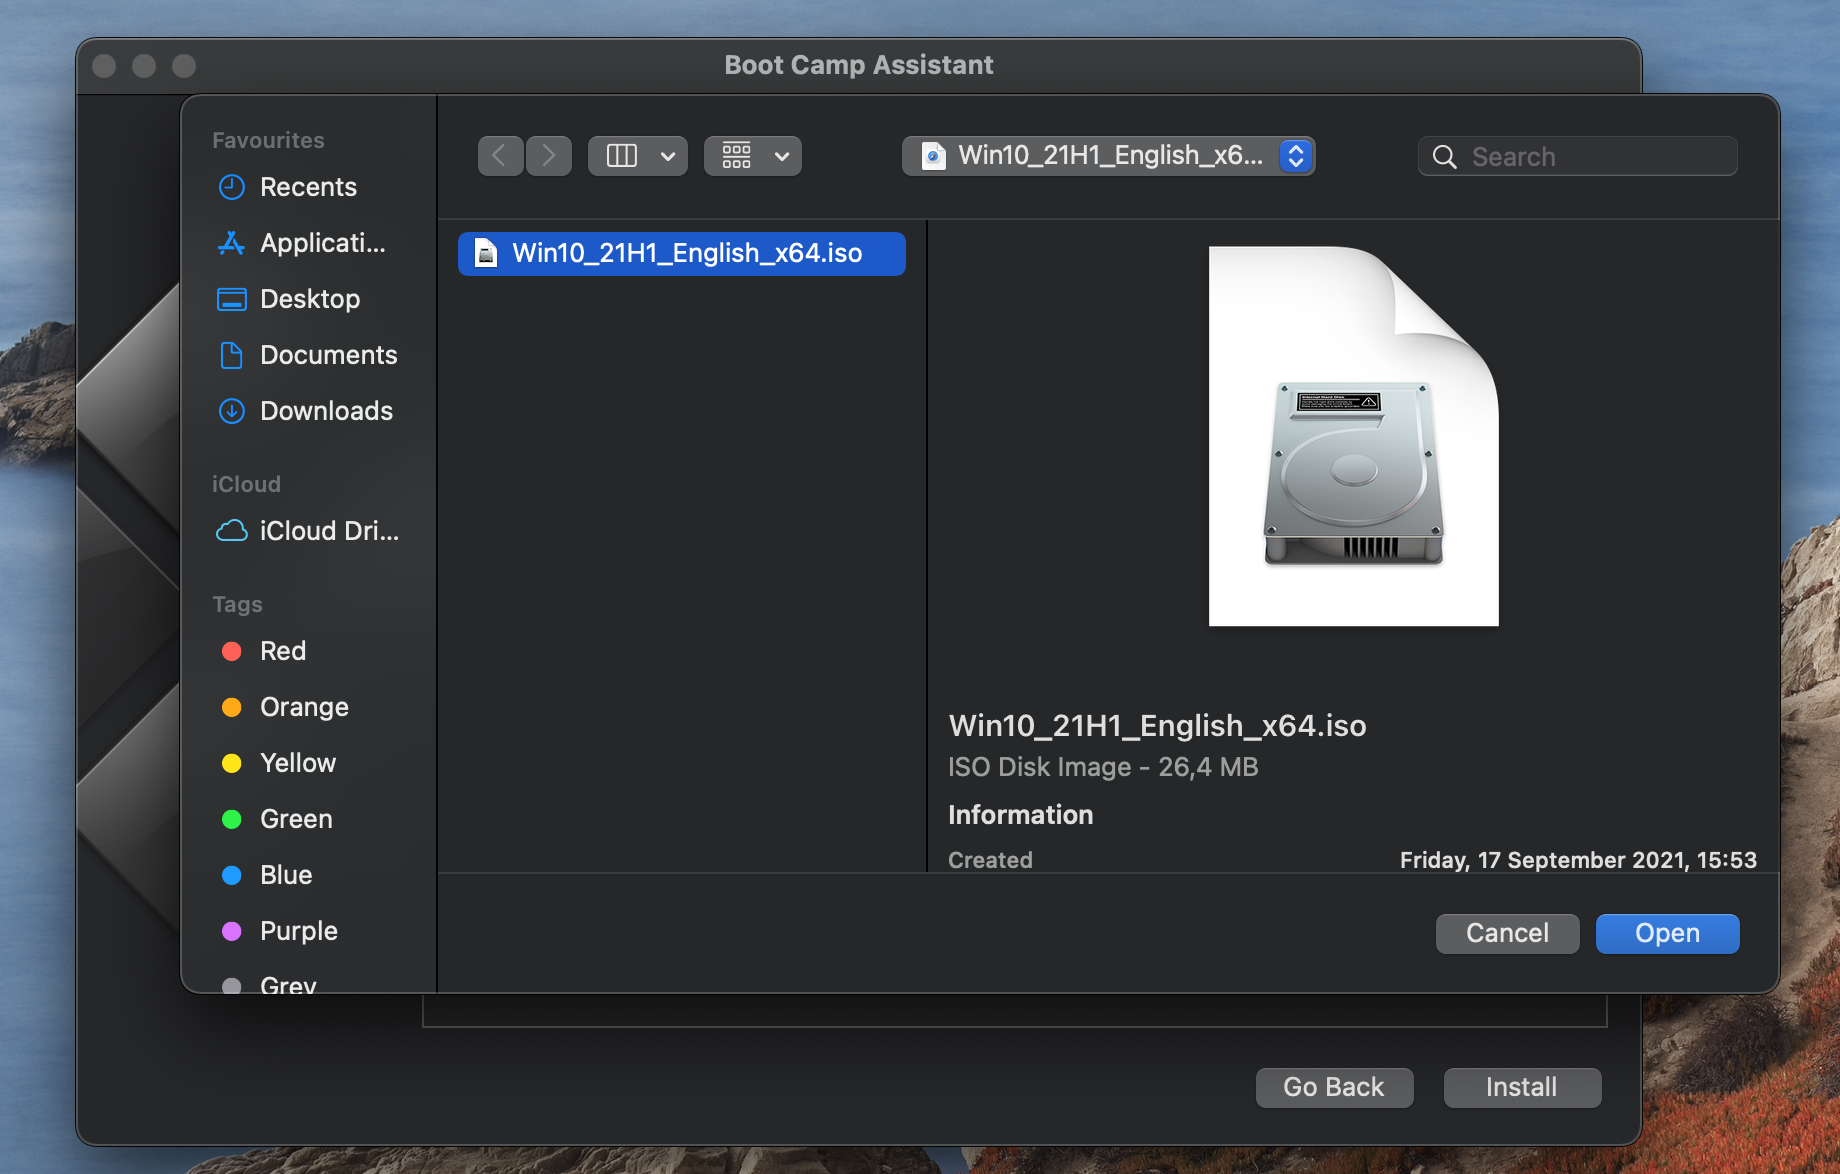
- After the ISO file is readily downloaded on your Mac, click Go, open Utilities, and start the Kick Army camp Banana app.
- Click Continue, select Cull a Windows 10 ISO file, click Choose again, discover the downloaded ISO file, select information technology, and click on Open.
- Now you must classify plenty storage space to the Windows 10 partition while still leaving some free infinite (preferably at to the lowest degree 40-50 GB) to your macOS partition. Exercise this by dragging to the left or correct the dot between the ii partitions. The Windows segmentation would need at least 150 GB of free storage space – if you cannot allocate that much to information technology while leaving at least 50 GB of gratis infinite on the macOS segmentation, you must starting time gratuitous upward some space on your Mac before you keep forward.
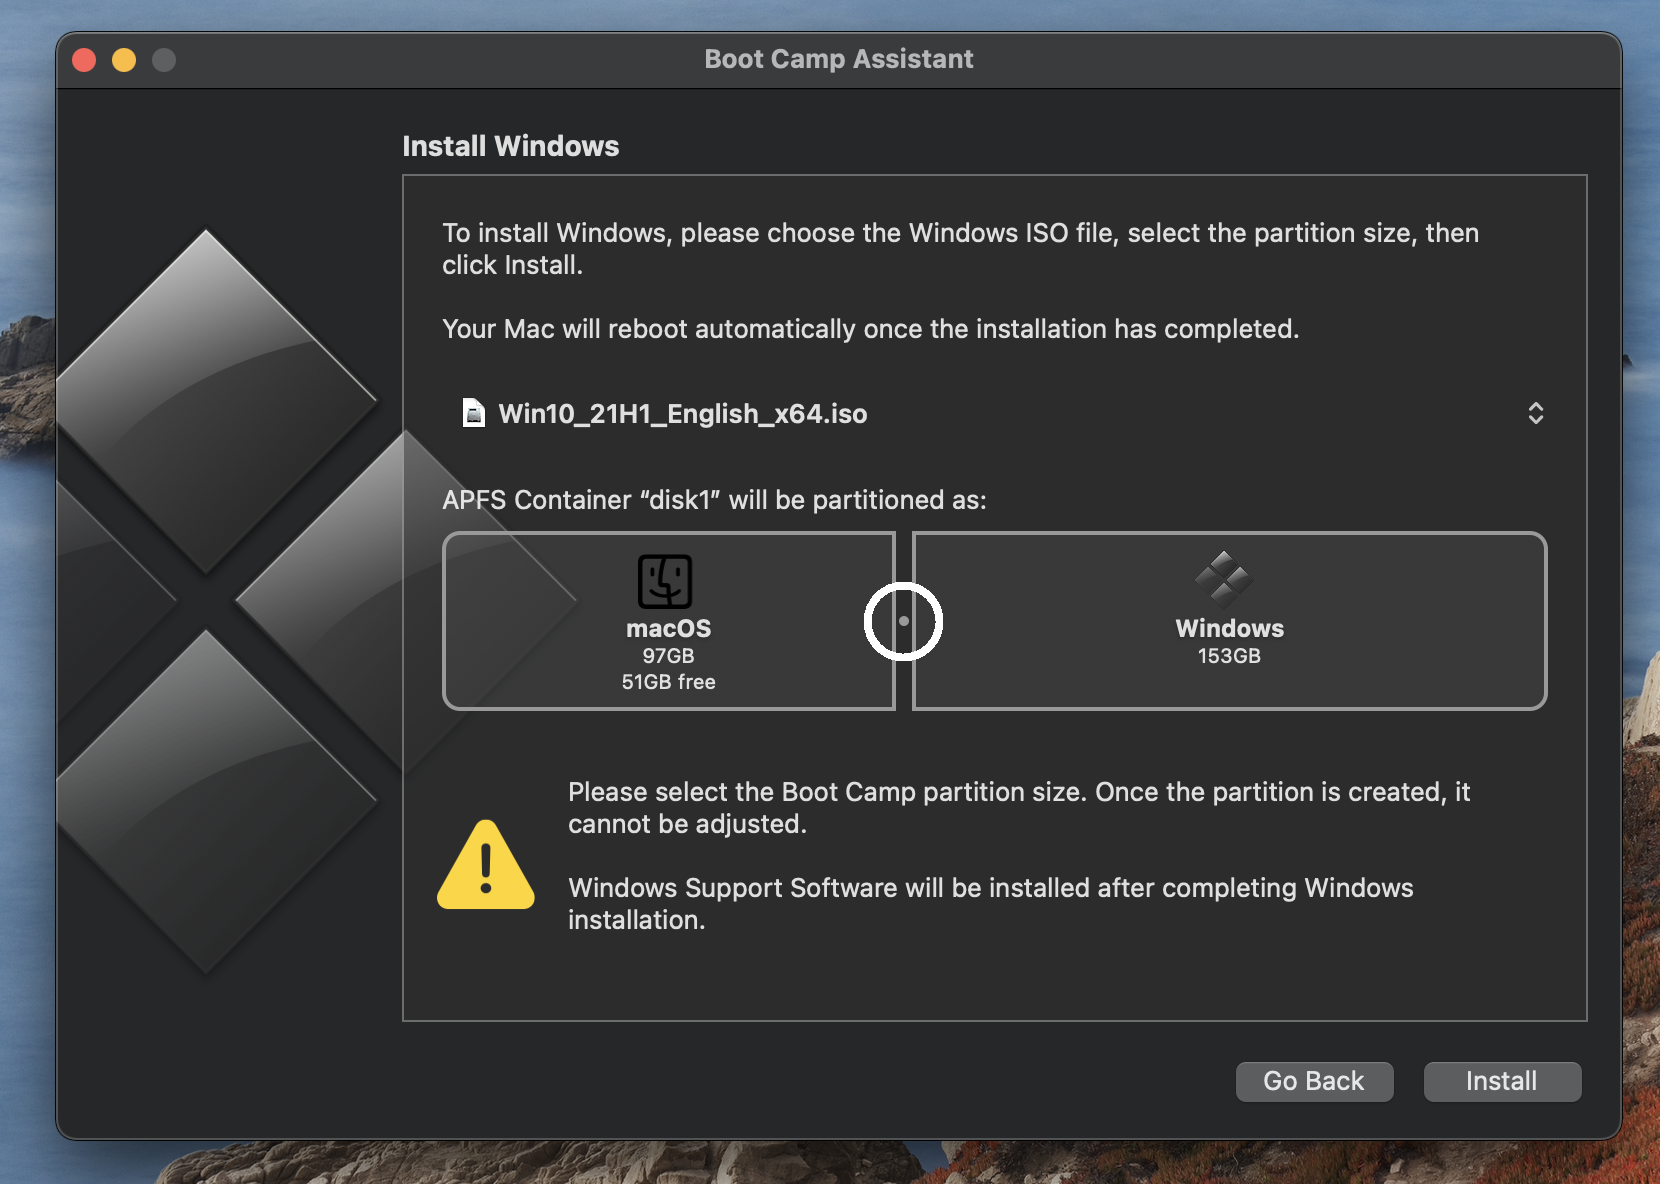
- Afterward you lot've made certain that both partitions have plenty storage space, click on Install – the initial phase of the installation will begin and one time it'south over, y'all will need to enter your Admin password to continue, so go ahead and do that.
- Your Mac will restart, and later it does, you lot will encounter the Windows logo on your screen – choose a language and location and then select Side by side.
- On the next screen, enter your product cardinal if you have one, or click Skip/I don't accept a production key, if you do non.
- If side by side yous are asked to choose whether to install Windows 10 Home or Windows 10 Pro, we advise opting for the Domicile Edition if you merely need Windows 10 for gaming and not for anything more than advanced. Click Adjacent/Continue after choosing an edition.
- Next, click the I Agree button, afterward which select Next and the installation should finally commence. Make sure that the MacBook is continued to a power source considering the Windows 10 installation will probable take some time and y'all don't want to risk running out of bombardment power during this process.
- One time the installation completes, the Mac will restart and kicking into Windows. Y'all will now need to cull whether to customize the Windows 10 settings or use the preset default ones – nosotros recommend the former option.
- Next, create a Windows account and a password for it and continue to the next screen.
- You will now be asked whether you'd like to actuate and customize the settings of Cortana, the Windows x virtual assistant, or do this another time. Pick your preference and go on.
- Windows 10 should finally load on, and y'all should see the Kick Camp Assistant open up on your screen – click Next in information technology, then click I Have, and click Side by side once more. This will kickoff the installation of important Apple tree drivers for Windows 10 that your Mac will need to properly use the Microsoft Os. As the drivers are getting installed, you may occasionally be asked for Admin permission, so confirm that you want the installation to proceed whenever this happens. Once everything is installed, and y'all are asked to restart your Mac, click on Aye.
- (Optional Step) After the restart, we recommend that you get to the Start Menu (bottom-left), open Apple Software Update, and install any available updates that may appear. Again, if your permission is required at whatsoever point, y'all should provide information technology.
- (Optional Footstep) The terminal thing nosotros recommend doing is to once again become to the Commencement Menu afterward your Mac restarts, open Updates & Security > Windows Update and wait as Windows installs any available updates. This is required in order to go the best performance in Windows 10. After all updates are installed, restart your Mac still again and after that everything should be ready for the installation of AoE 4.
Useful tips:
To restart into macOS when you are in the Windows sectionalisation, select the small slanted square icon in the bottom-right and click Restart in macOS. If no such icon can be seen at that place, select the icon of an pointer pointing upward, and yous should see the foursquare icon in the small box that appears.
To restart in Windows 10 from macOS, open the Apple Carte du jour, and get to System Preferences > Startup Deejay. At that place, click the padlock, enter your password and click Unlock. Next, select Bootcamp Windows then select Restart.
Installing Age of Empires 4
Regardless of whether yous used Parallels or Boot Camp Assistant to get Windows on your Mac, the installation of the game itself is performed in the aforementioned way, namely:
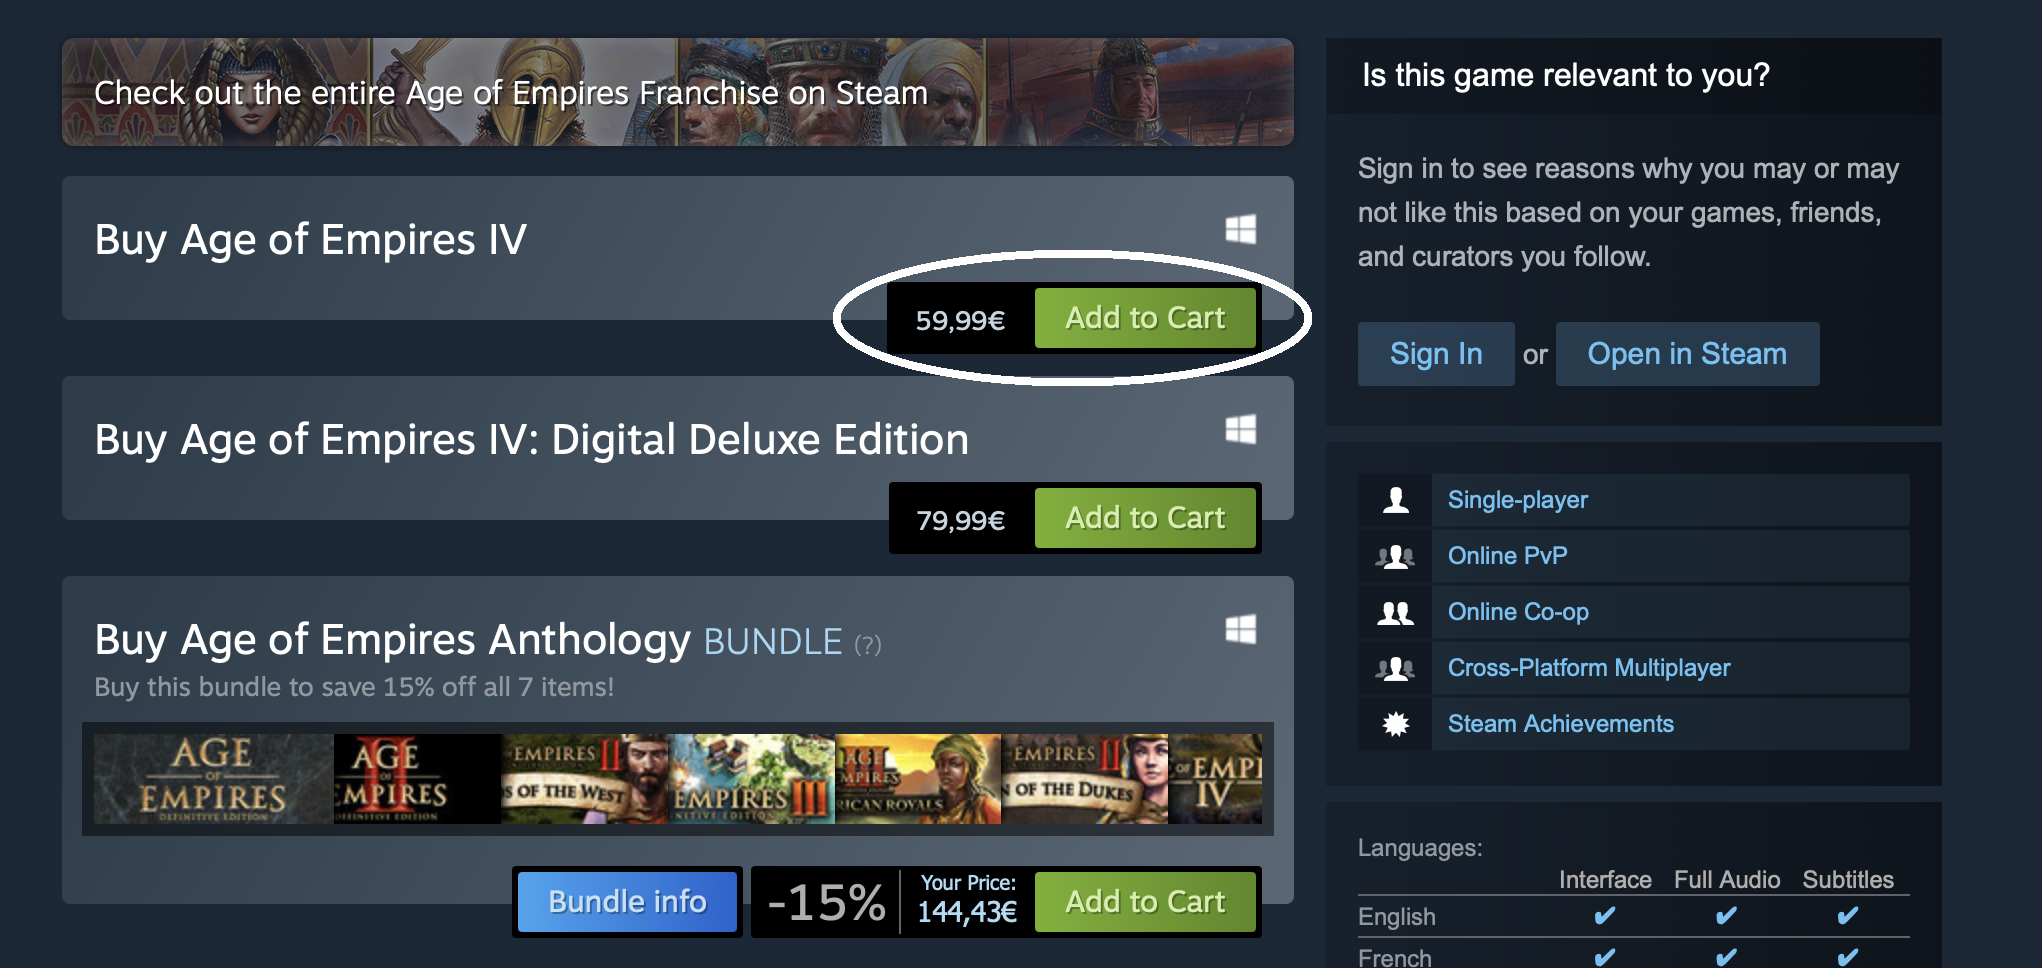
- Go to the Steam folio of the game and click Add to Cart.
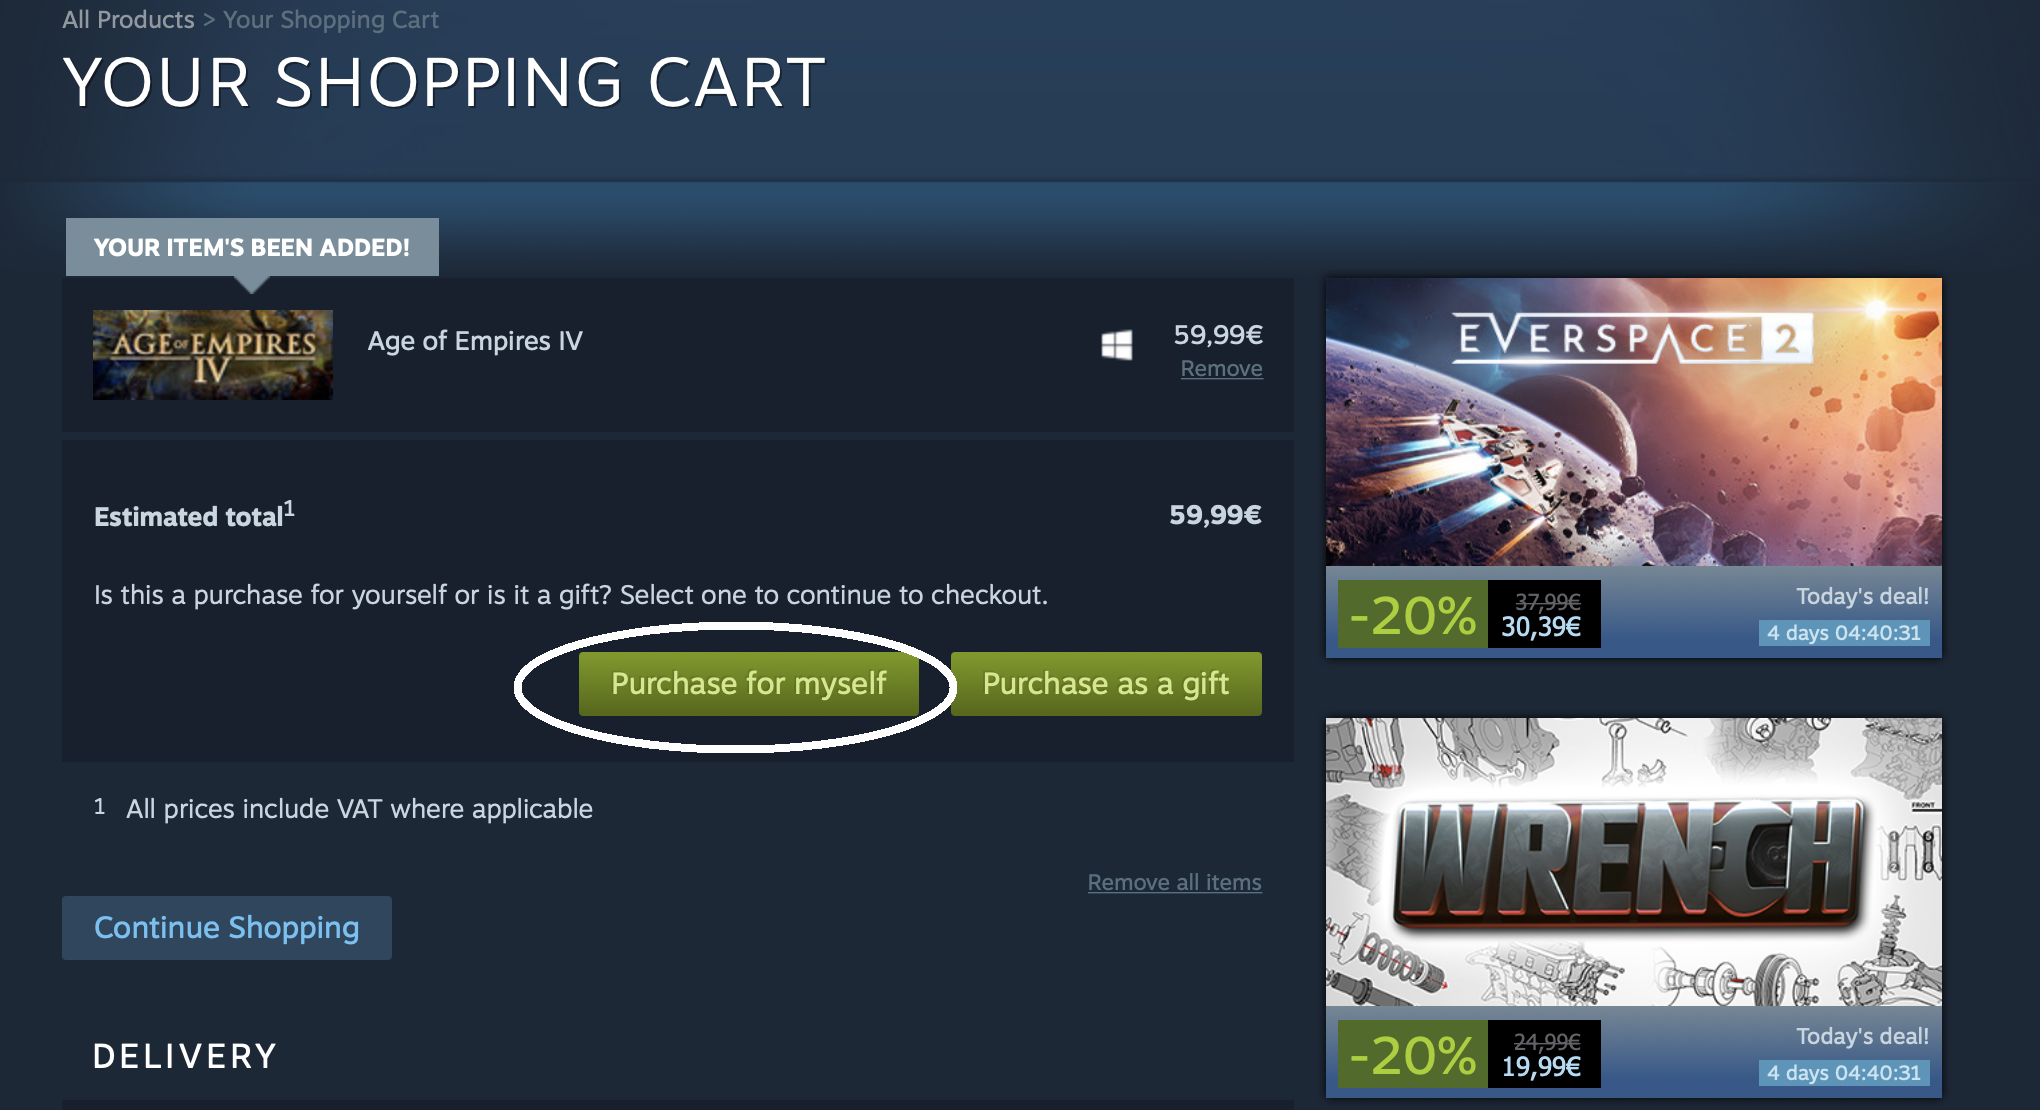
- On the next folio, click Purchase for myself, and Sign in to your Steam account. IF y'all don't take an account notwithstanding, create one at present.
- Side by side, select a payment method and click Continue.
- Provide your payment details and purchase the game.
- If you don't already have the Steam client app, go to the download page of Steam site and click Install Steam.
- Download the installation file for the Steam client, then open it, and install the client app.
- Open the Steam client from your Applications folder and sign in to your Steam account.
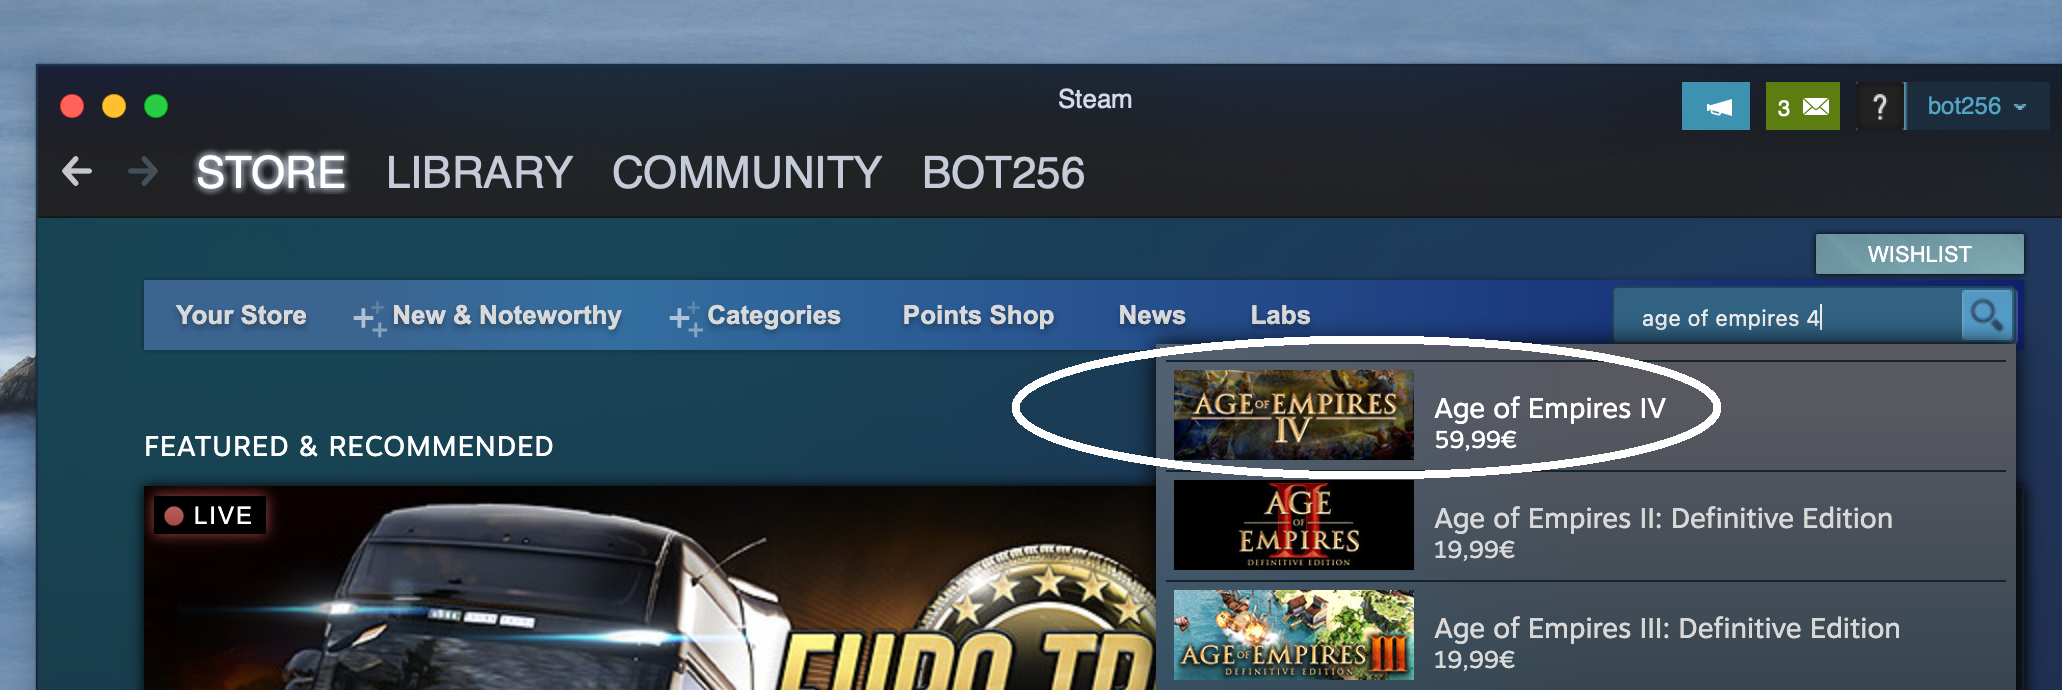
- Search for Age of Empires iv in the search bar, click on the game'due south title, and on the game'south page, click Play Game.
- Side by side, complete the installation steps and once the game is downloaded and installed, you lot can start playing it.
Age of Empires 2 Download for Mac Os X
Posted by: pankratzweressid.blogspot.com
Post a Comment